 how-to
Indoor Basketball Balance Exercises for Kids
Table of Contents
- Why Balance and Coordination Decide Basketball Performance
- Basketball Balance Exercises You Can Do in a Small Space
- Basketball Coordination Drills That Build Footwork and Body Control
- Indoor Basketball Drills for Kids: Landing, Stopping, and Changing Direction
- Youth Basketball Training at Home: A Weekly Plan That Fits Your Living Room
- Progressions, Regressions, and How to Measure Improvement
- Safety, Space, and Equipment Checklist
- Frequently Asked Questions
Last Updated: October 17, 2026
Why Balance and Coordination Decide Basketball Performance
Indoor basketball exercises for improving balance and coordination matter because every cut, stop, and jump starts with control over your own body. A player who can't hold a single-leg stance will lose the drive. A player who lands stiff will get beat on the next step.
Balance isn't a gift you're born with. It's a trainable skill, and it responds fast to short, consistent practice.
The Three Systems Behind Every Stable Move
Three systems work together to keep a player upright and in control:
- Sight tells the brain where the body sits in space.
- The inner ear senses tilt and rotation.
- Proprioception, the body's sense of joint position, feeds constant updates from ankles, knees, and hips.
When all three agree, movement looks smooth. When one lags, players wobble, reach with their hands, or lose the ball on contact. Coordination training sharpens that feedback loop, and it takes only minutes a day.
Basketball Balance Exercises You Can Do in a Small Space
You can run effective basketball balance exercises in a space the size of a hallway. No hoop, no court, no special gear. The key is slow, controlled reps with a focus on staying still, not rushing through sets. This is the gap most general balance articles miss: the drills have to fit a living room, a basement, or a two-metre strip of carpet, and they have to be sequenced so a player can repeat them without a coach watching every rep.
The Six-Drill Balance Block
Run this block in order. The sequence moves from static to dynamic, which is how balance actually transfers to cutting and landing.
- Single-leg stance hold: stand on one foot, other knee lifted to hip height, hold 20-30 seconds per side. Keep the standing knee soft, not locked.
- Single-leg reach: balance on one leg and tap the floor in front, to the side, and behind, five taps each direction. Reach slowly enough that the hips stay level.
- Toe walking: walk on tiptoes across the room and back, 20 steps. Keep the ankles tall and the core braced.
- Heel walking: walk on heels the same distance, keeping toes up. This loads the shin muscles that control deceleration.
- Weight shifting: stand feet wide, slowly shift side to side, holding each side for three seconds. This teaches the hip and ankle to share the load.
- Small hops: tiny two-foot hops in place, landing soft and quiet, 10 reps. Pause one second between hops so each landing is a separate rep.
Sets, Reps, and Rest
Do two rounds of the block with 45-60 seconds of rest between rounds. Total time is about 10-12 minutes. Three sessions a week is enough; balance adapts on frequency, not volume. If a player can complete every hold without touching down or hopping, add a round before adding difficulty.
Soft landings are the whole point. If you can hear the feet hit the floor, the landing control isn't there yet.
Progressions and Regressions
Every drill in the block has an easier and a harder version, so a five-year-old and a twelve-year-old can work the same skill at different levels.
- Regression: hold a wall or chair for single-leg balance, reduce hold time to 10 seconds, or do the reach with the toe only lightly touching the floor.
- Progression: add eyes-closed holds for the final five seconds, stand on a folded towel for an uneven surface, or catch a small ball while balancing.
- Measure it: time single-leg holds monthly and count consecutive quiet landings. A simple balance test tells you plenty: how long can the player stand on one foot, eyes open, without hopping? Most players improve within a few weeks of steady practice.
Indoor Surface and Space Rules
Balance work is only as safe as the floor under it. Use a mat or carpet for hopping and landing drills, clear a 2-by-3 metre area of furniture and toys, and wear supportive shoes or non-slip socks. Avoid unstable equipment such as wobble boards or balance cushions unless a coach or physiotherapist has cleared their use, especially for younger players.
Basketball Coordination Drills That Build Footwork and Body Control
Basketball coordination drills train the body to move limbs in sequence while staying balanced. Start with slow patterns, then add speed once the movement looks clean. Speed on sloppy form just locks in bad habits.
Run these three drills in a clear two-metre strip:
- Ladder-free footwork: quick small steps forward and back, then side to side, 20 seconds each.
- Ball taps and switches: pass the ball hand to hand around the waist, then around each leg, 30 seconds.
- Defensive slides: stay low, slide three steps right, three left, keeping feet wide and chest up.
Coordination and body control show up most in the defensive slide. Players who cross their feet or stand tall get beaten off the dribble. Watch the feet, not the hands.
Indoor Basketball Drills for Kids: Landing, Stopping, and Changing Direction
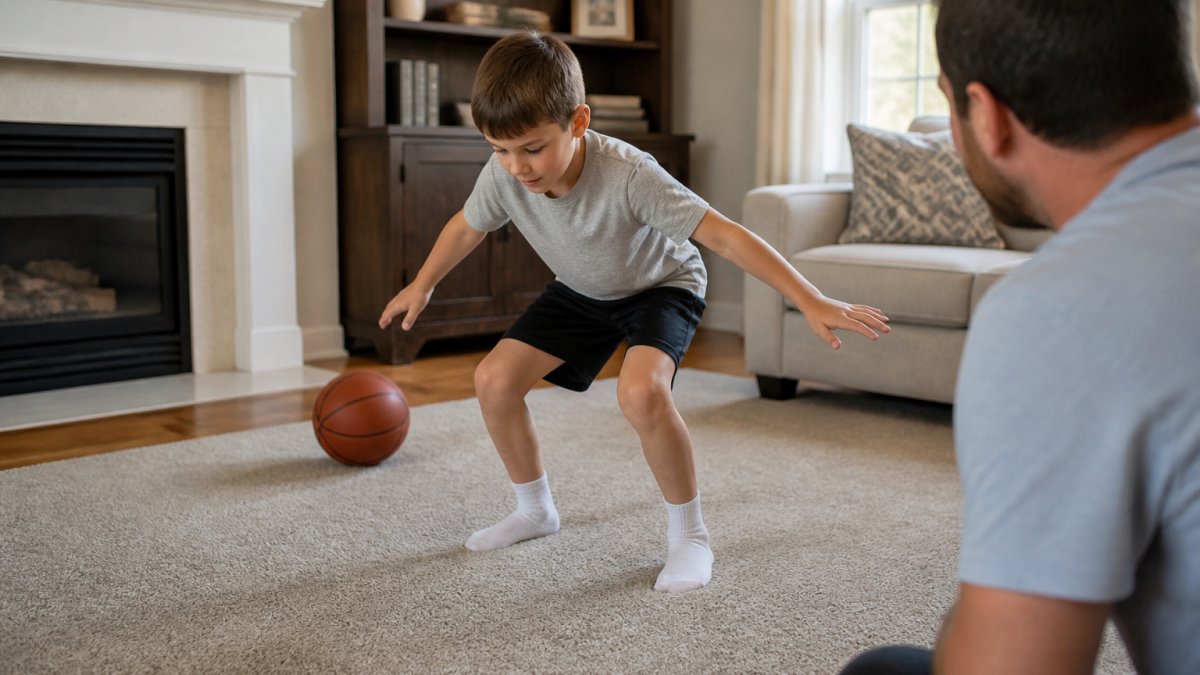
Indoor basketball drills for kids should teach landing and stopping before anything else. These are the movements that protect young knees and ankles, and they translate straight to game speed. Keep sessions short and playful, especially for ages four to ten.
Landing Mechanics After Jumps
Good landing mechanics start with a quiet landing. Teach kids to jump straight up, land on both feet at the same time, bend knees and hips, and freeze for two seconds. Repeat 8-10 times.
Watch for knees caving inward. That's the single most common flaw we correct, and fixing it early protects the joint for years.
Controlled Stops and Deceleration
Controlled stopping means slowing down in steps, not one hard plant. Set two markers a few metres apart. Have the player jog, then take three quick choppy steps to stop, holding a balanced stance.
Deceleration drills build the same muscles used to guard a dribbler. They also cut the risk of rolled ankles on hard stops.
Youth Basketball Training at Home: A Weekly Plan That Fits Your Living Room
Youth basketball training at home works best as a short, repeatable routine. Three sessions of 15-20 minutes beat one long weekend session every time. This is the gap most balance articles leave open: they list drills but never say what to do on which day, in what order, for how many sets, or how to progress. Here is a complete weekly plan you can run in a living room or basement.
The Weekly Schedule
| Day | Focus | Time | Session Structure |
|---|---|---|---|
| Monday | Static balance | 15 min | 3-min warm-up, six-drill balance block (2 rounds), 2-min cool-down |
| Wednesday | Coordination and footwork | 15 min | 3-min warm-up, footwork and ball-handling circuit (3 rounds), 2-min cool-down |
| Friday | Landing and stopping | 20 min | 3-min warm-up, jump landings (3 sets of 8), controlled stops (3 sets of 5 each side), small hops (2 sets of 10) |
| Weekend | Free play | 20 min | Dribbling and shooting games for fun, no structured sets |
Session Order and Rest
Warm up for three minutes with light movement: marching in place, arm circles, and slow bodyweight squats. Then run the main block. Rest 45-60 seconds between rounds and 30 seconds between sets. Finish with two minutes of easy walking and gentle ankle circles. The order matters: static balance first, then coordination, then landing and stopping, because each block builds on the control the previous one demands.
How to Progress Week to Week
Keep the same schedule for four weeks before changing anything. Progress one variable at a time:
- Week 1-2: complete every drill with the regression options if needed.
- Week 3-4: add a third round to the balance block or increase hold times to 30-40 seconds.
- Week 5-6: add eyes-closed holds, uneven surfaces, or a ball catch while balancing.
If a player misses a session, do not double up the next day. Consistency matters more than volume, and fun keeps kids coming back. Cut a session short if the player is tired or distracted.
What to Track
Keep a simple notebook with three numbers per week: longest single-leg hold time, number of consecutive quiet landings, and whether the player completed all rounds without touching down. These three checks make progress visible and tell you when to progress or regress.
Progressions, Regressions, and How to Measure Improvement
Progress and regress every drill to match the player. A regression makes a drill easier; a progression adds difficulty. This keeps a five-year-old and a twelve-year-old working the same skill at different levels.
- Regression: hold a wall or chair for single-leg balance, or reduce hold time to 10 seconds.
- Progression: add eyes-closed holds, uneven surfaces like a folded towel, or catching a ball while balancing.
- Measure it: time single-leg holds monthly and count consecutive clean landings. Track the numbers in a notebook.
A simple balance test tells you plenty: how long can the player stand on one foot, eyes open, without hopping? Most kids improve within a few weeks of steady practice.
Safety, Space, and Equipment Checklist
Safety comes down to a few basics, and they take five minutes to set up. Clear the space, check the surface, and keep sessions short. Most home injuries come from clutter and hard floors, not from the drills themselves.
Use this checklist before every session:
- Clear a 2-by-3 metre area of furniture and toys
- Use a mat or carpet for landing and hopping drills
- Check for sharp corners and low tables
For families in Halton Hills, our programs at Tier 1 Sports build these same habits under coached supervision, with age-specific groups from ages 4 to 16. The Canadian Paediatric Society's guidance on physical activity for children supports daily movement and skill-building play for young athletes, which is exactly what these drills deliver.
If you want a structured path from these home drills into coached play, our recreational and rep pathways give kids a place to grow. And for families weighing a bigger commitment, ParticipACTION's resources on youth physical literacy explain why movement skills learned early carry into every sport.
Balance and coordination don't need a gym, a hoop, or an hour of free time. They need short, steady practice and a coach who knows what good movement looks like.
Frequently Asked Questions
What are some good balance exercises for basketball?
Start with single-leg stands, holding each side for 20 to 30 seconds, then add small hops on one foot and toe-to-heel walking across the room. For basketball balance exercises, the most useful ones mimic game movements: landing softly from a two-foot jump, stopping on one foot after a short sprint, and holding a defensive stance for 15 seconds. Keep sets short and repeat two to three times per side. These build ankle and core stability that carry directly into cutting, pivoting, and rebounding.
How often should my child practice basketball coordination drills?
Two to three short sessions per week works well for most kids aged 7 to 12, with each session lasting 15 to 25 minutes. Consistency matters more than length. A 15-minute session with a ball-handling pattern, a few single-leg balance holds, and five controlled jump landings gives a young athlete plenty to work on. Spread sessions across the week so there is at least one rest day between them, and swap in a lighter session if your child seems tired or distracted.
Can indoor basketball drills for kids really improve footwork?
Yes, as long as the drills include directional movement and not just standing still. Static balance holds build a base, but footwork improves when kids practice defensive slides, quick stops, and changes of direction. Set up two markers about two metres apart and have your child slide side to side, then stop and pivot. Ten to 15 minutes of this two or three times a week builds the coordination and body control that show up on the court.
What equipment do I need for youth basketball training at home?
Very little. A junior-sized basketball, a clear space of about three by three metres, and two markers (water bottles or socks work) cover most drills. A non-slip mat helps on hardwood or tile floors. Skip any drill that involves jumping onto furniture or landing on hard surfaces without padding. If you want to track progress, a stopwatch and a simple notebook are enough to log single-leg hold times and landing control scores week to week.